Tutorial

Social Enhancement Application
For Visually Impaired People

#

Do know how to use

Tutorial

Check it now


Tutorial


To ensure a better user experience, please provide all required permission and service for SEAVIP application.
Any issue with installation?
You may check the Installation Guide.
Recognition

Camera


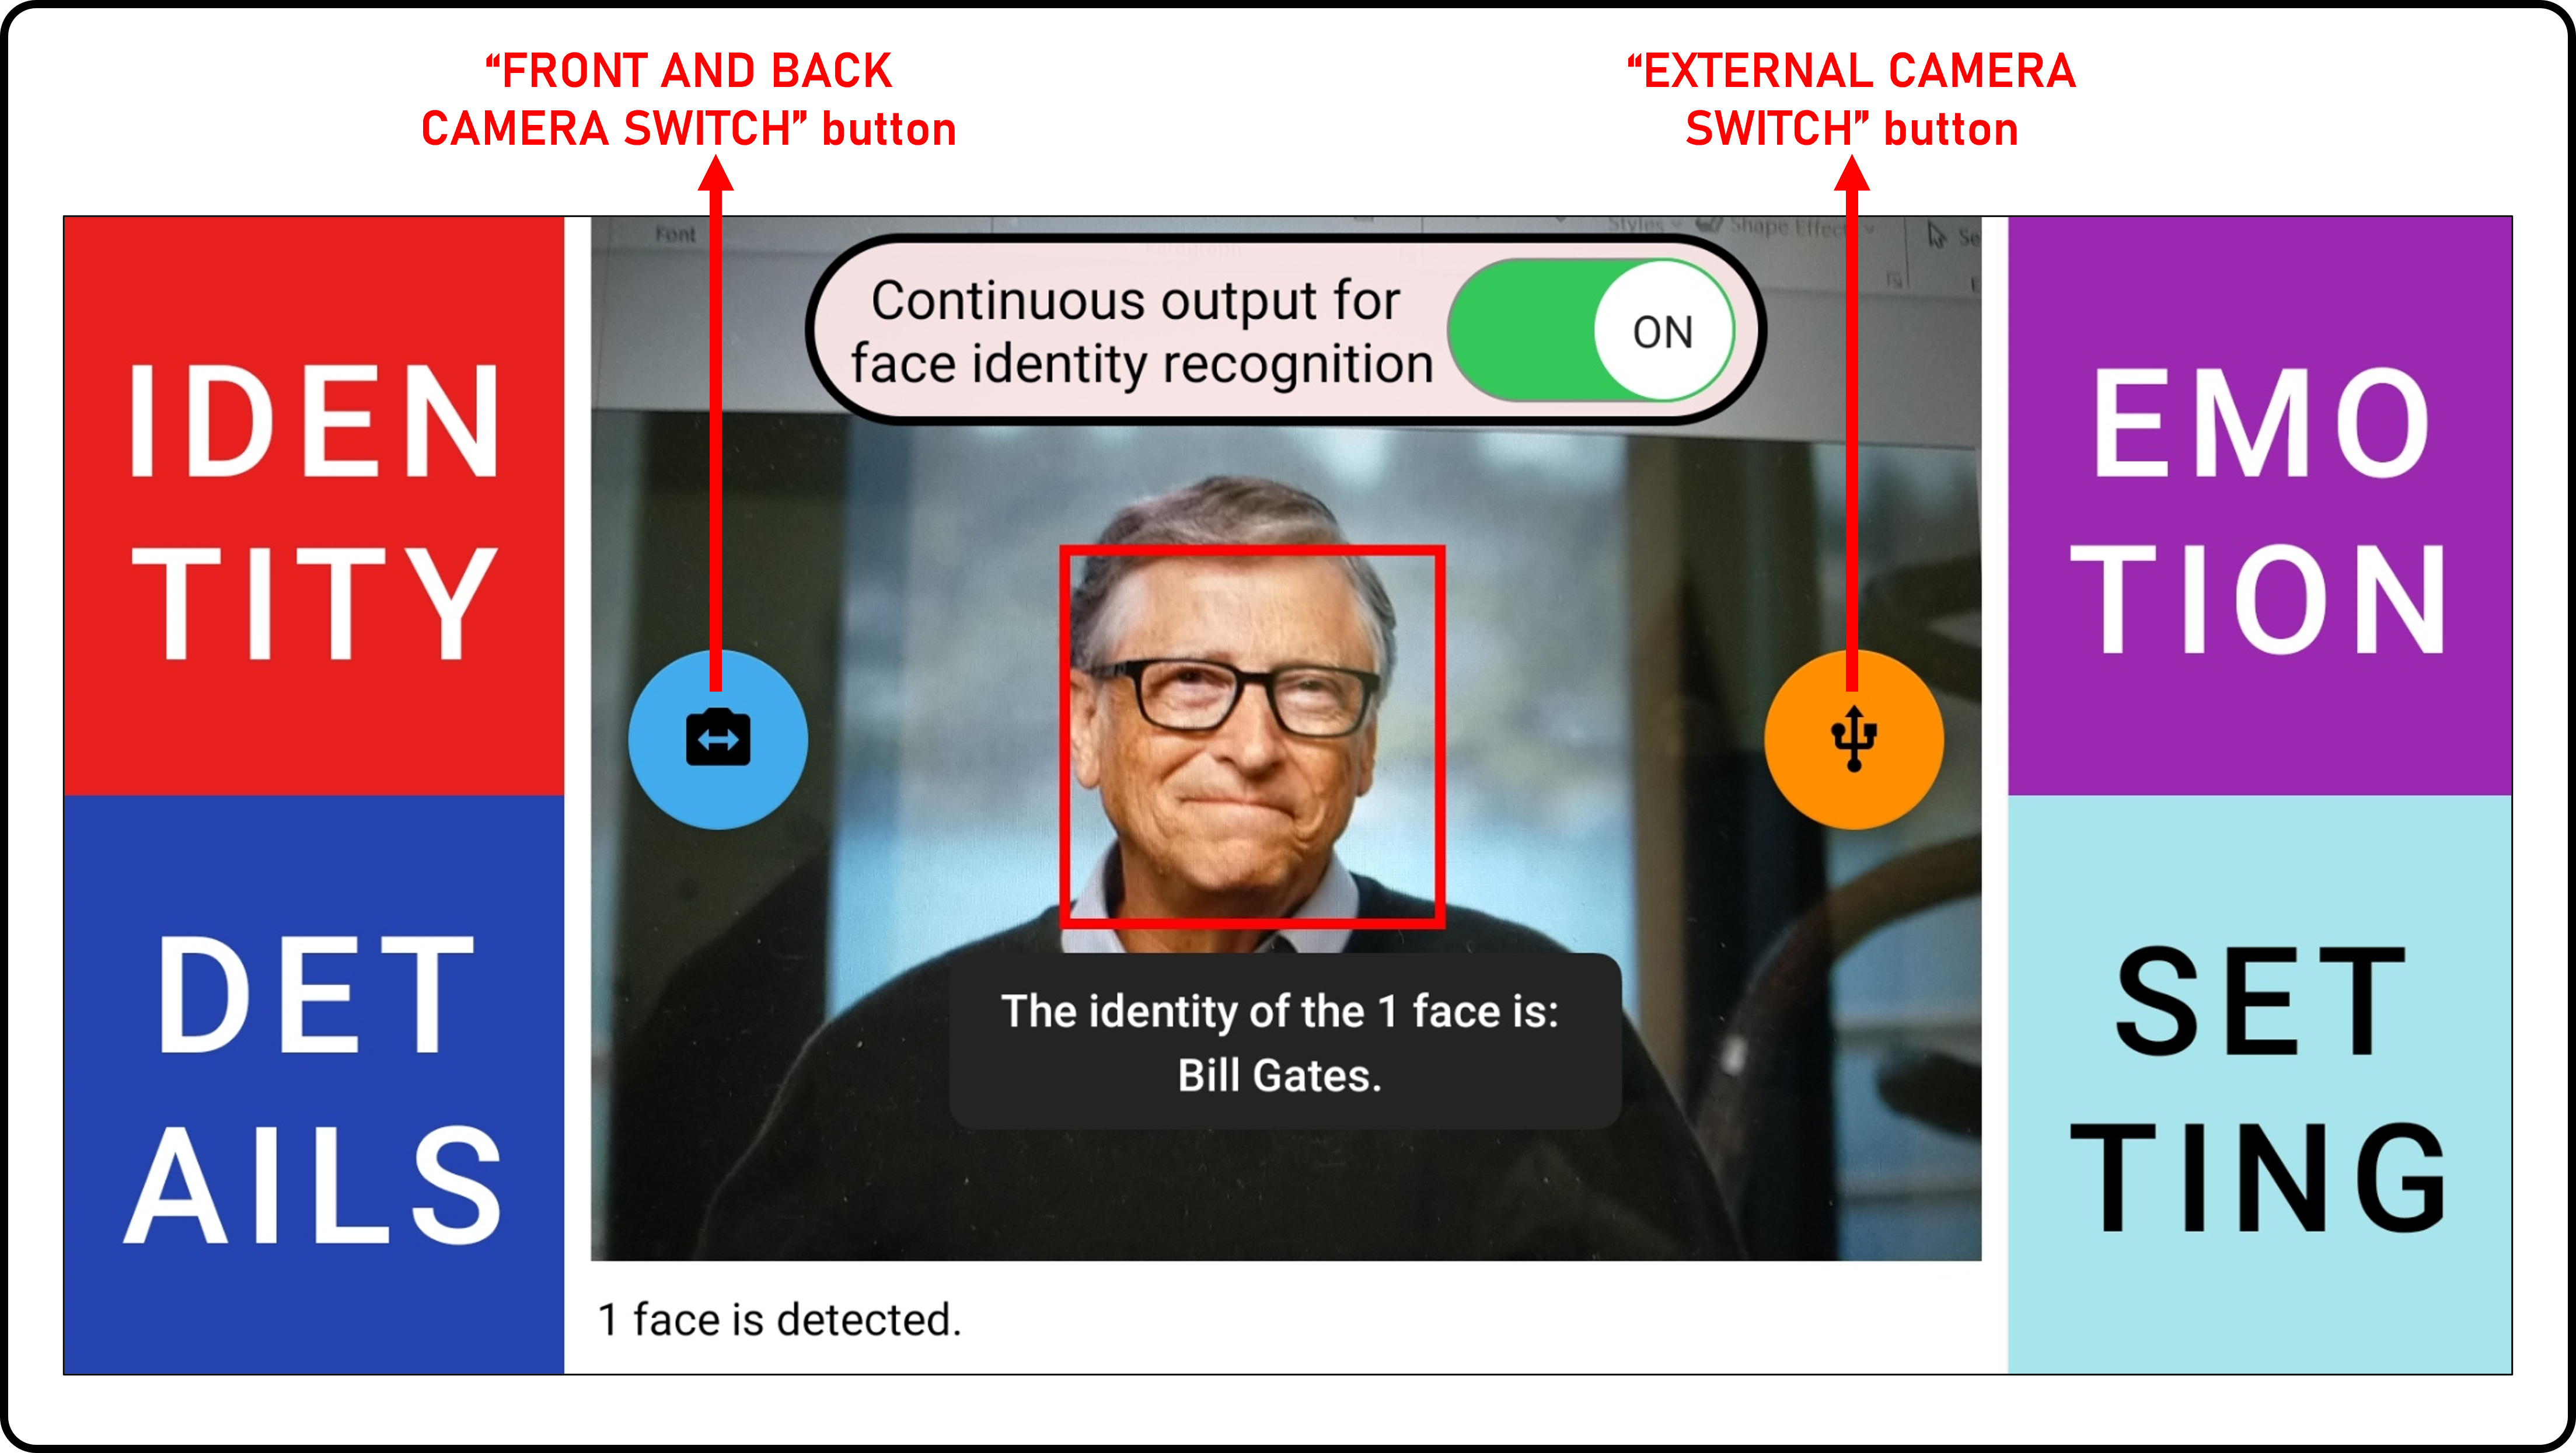
camera recognition page print screen

  1. There are 4 buttons at each corner.
  2. The bottom right button is for setting and others are for face recognition functions.
  3. The face recognition includes person identity recognition ("IDENTITY" button), face emotion recognition ("EMOTION" button), and gender and age recognition ("DETAILS" button).
  4. When the button is short clicked, only the most significant face is used for recognition. Alternately, when the button is long clicked, all the faces in the camera view are analysed.
  5. The center is the camera view. In the camera view, there is a continuous output toggle at top center. You may long press to set the output interval time.


  • There are two buttons are located at both left and right in camera view. These button is used to switch between device cameras or/and external camera.


On-Screen


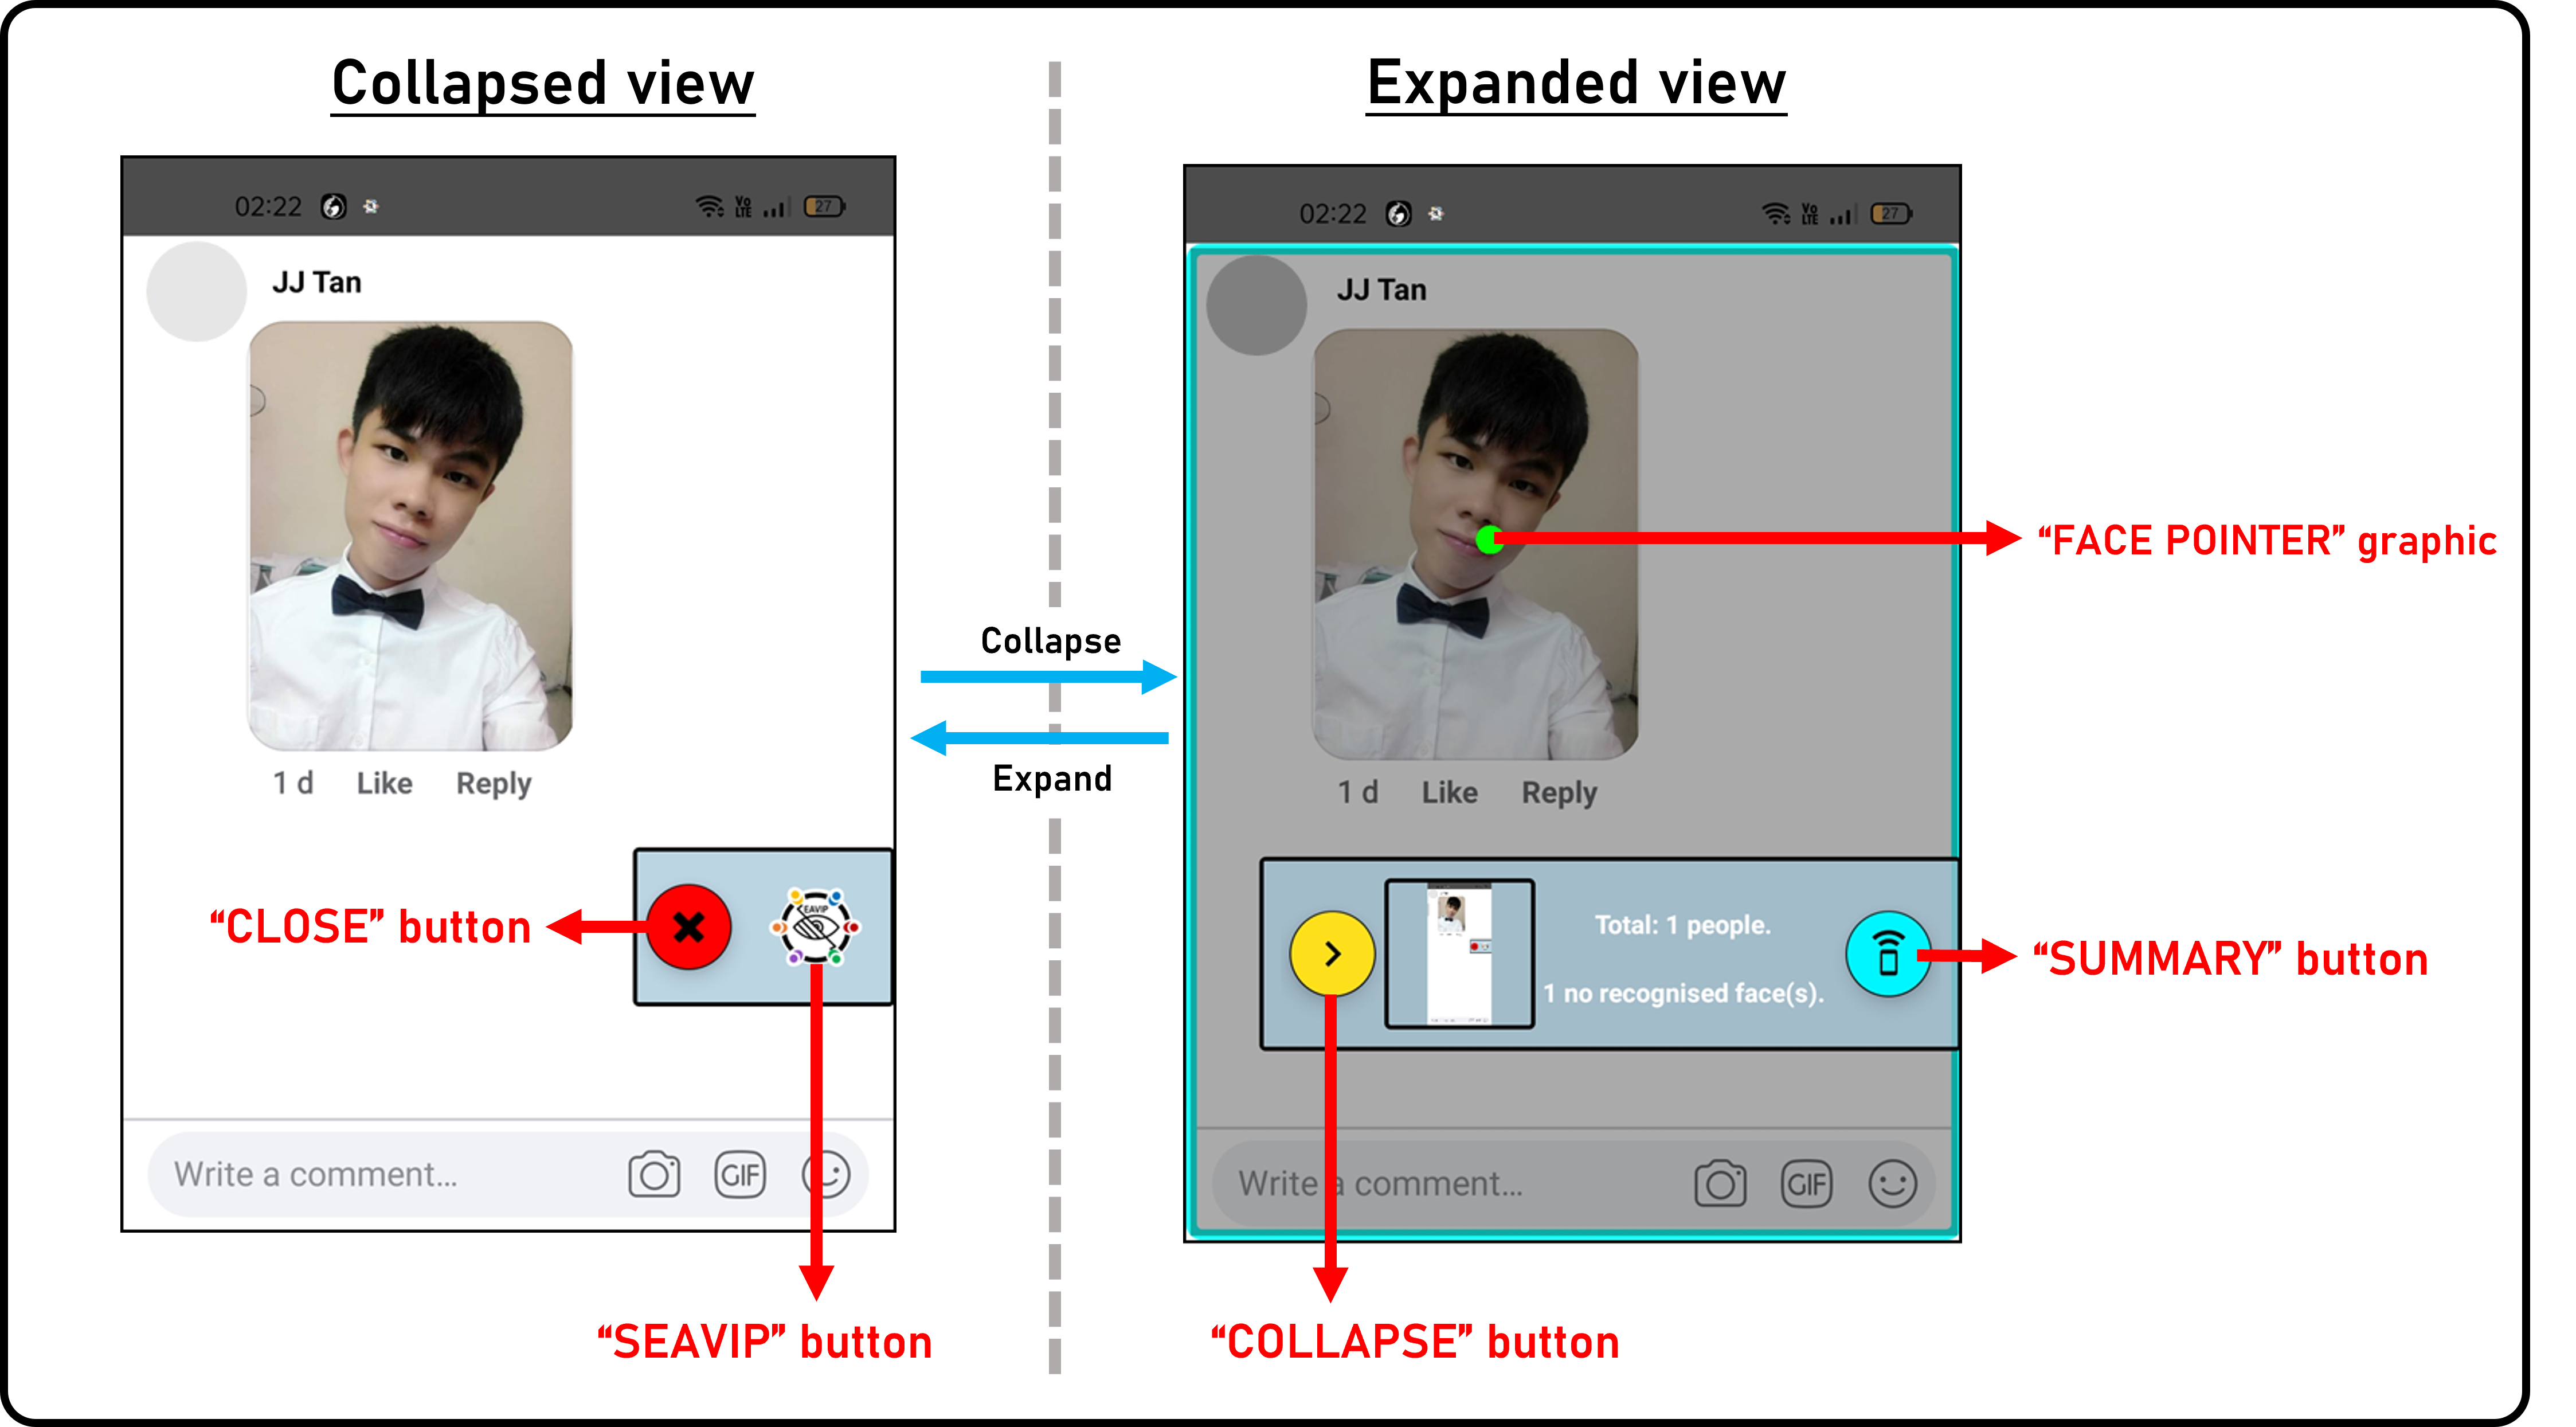
screen recognition page print screen

  1. There is a floating widget provided. You may click the "SEAVIP" button when needs face recognition.
  2. Click the "SUMMARY" button to get the screen face summary.
  3. Upon processing, the face on the current screen will be labelled by a "FACE POINTER" graphic.
  4. After that, move the finger around the screen to obtain the details of the pointed face.


  • You may open the on screen recognition service in the SEAVIP Setting page.
  • You may also open the on screen recognition service via the notification bar.
  • Required permission may be prompted during initialisation.


Add Face Record

Camera


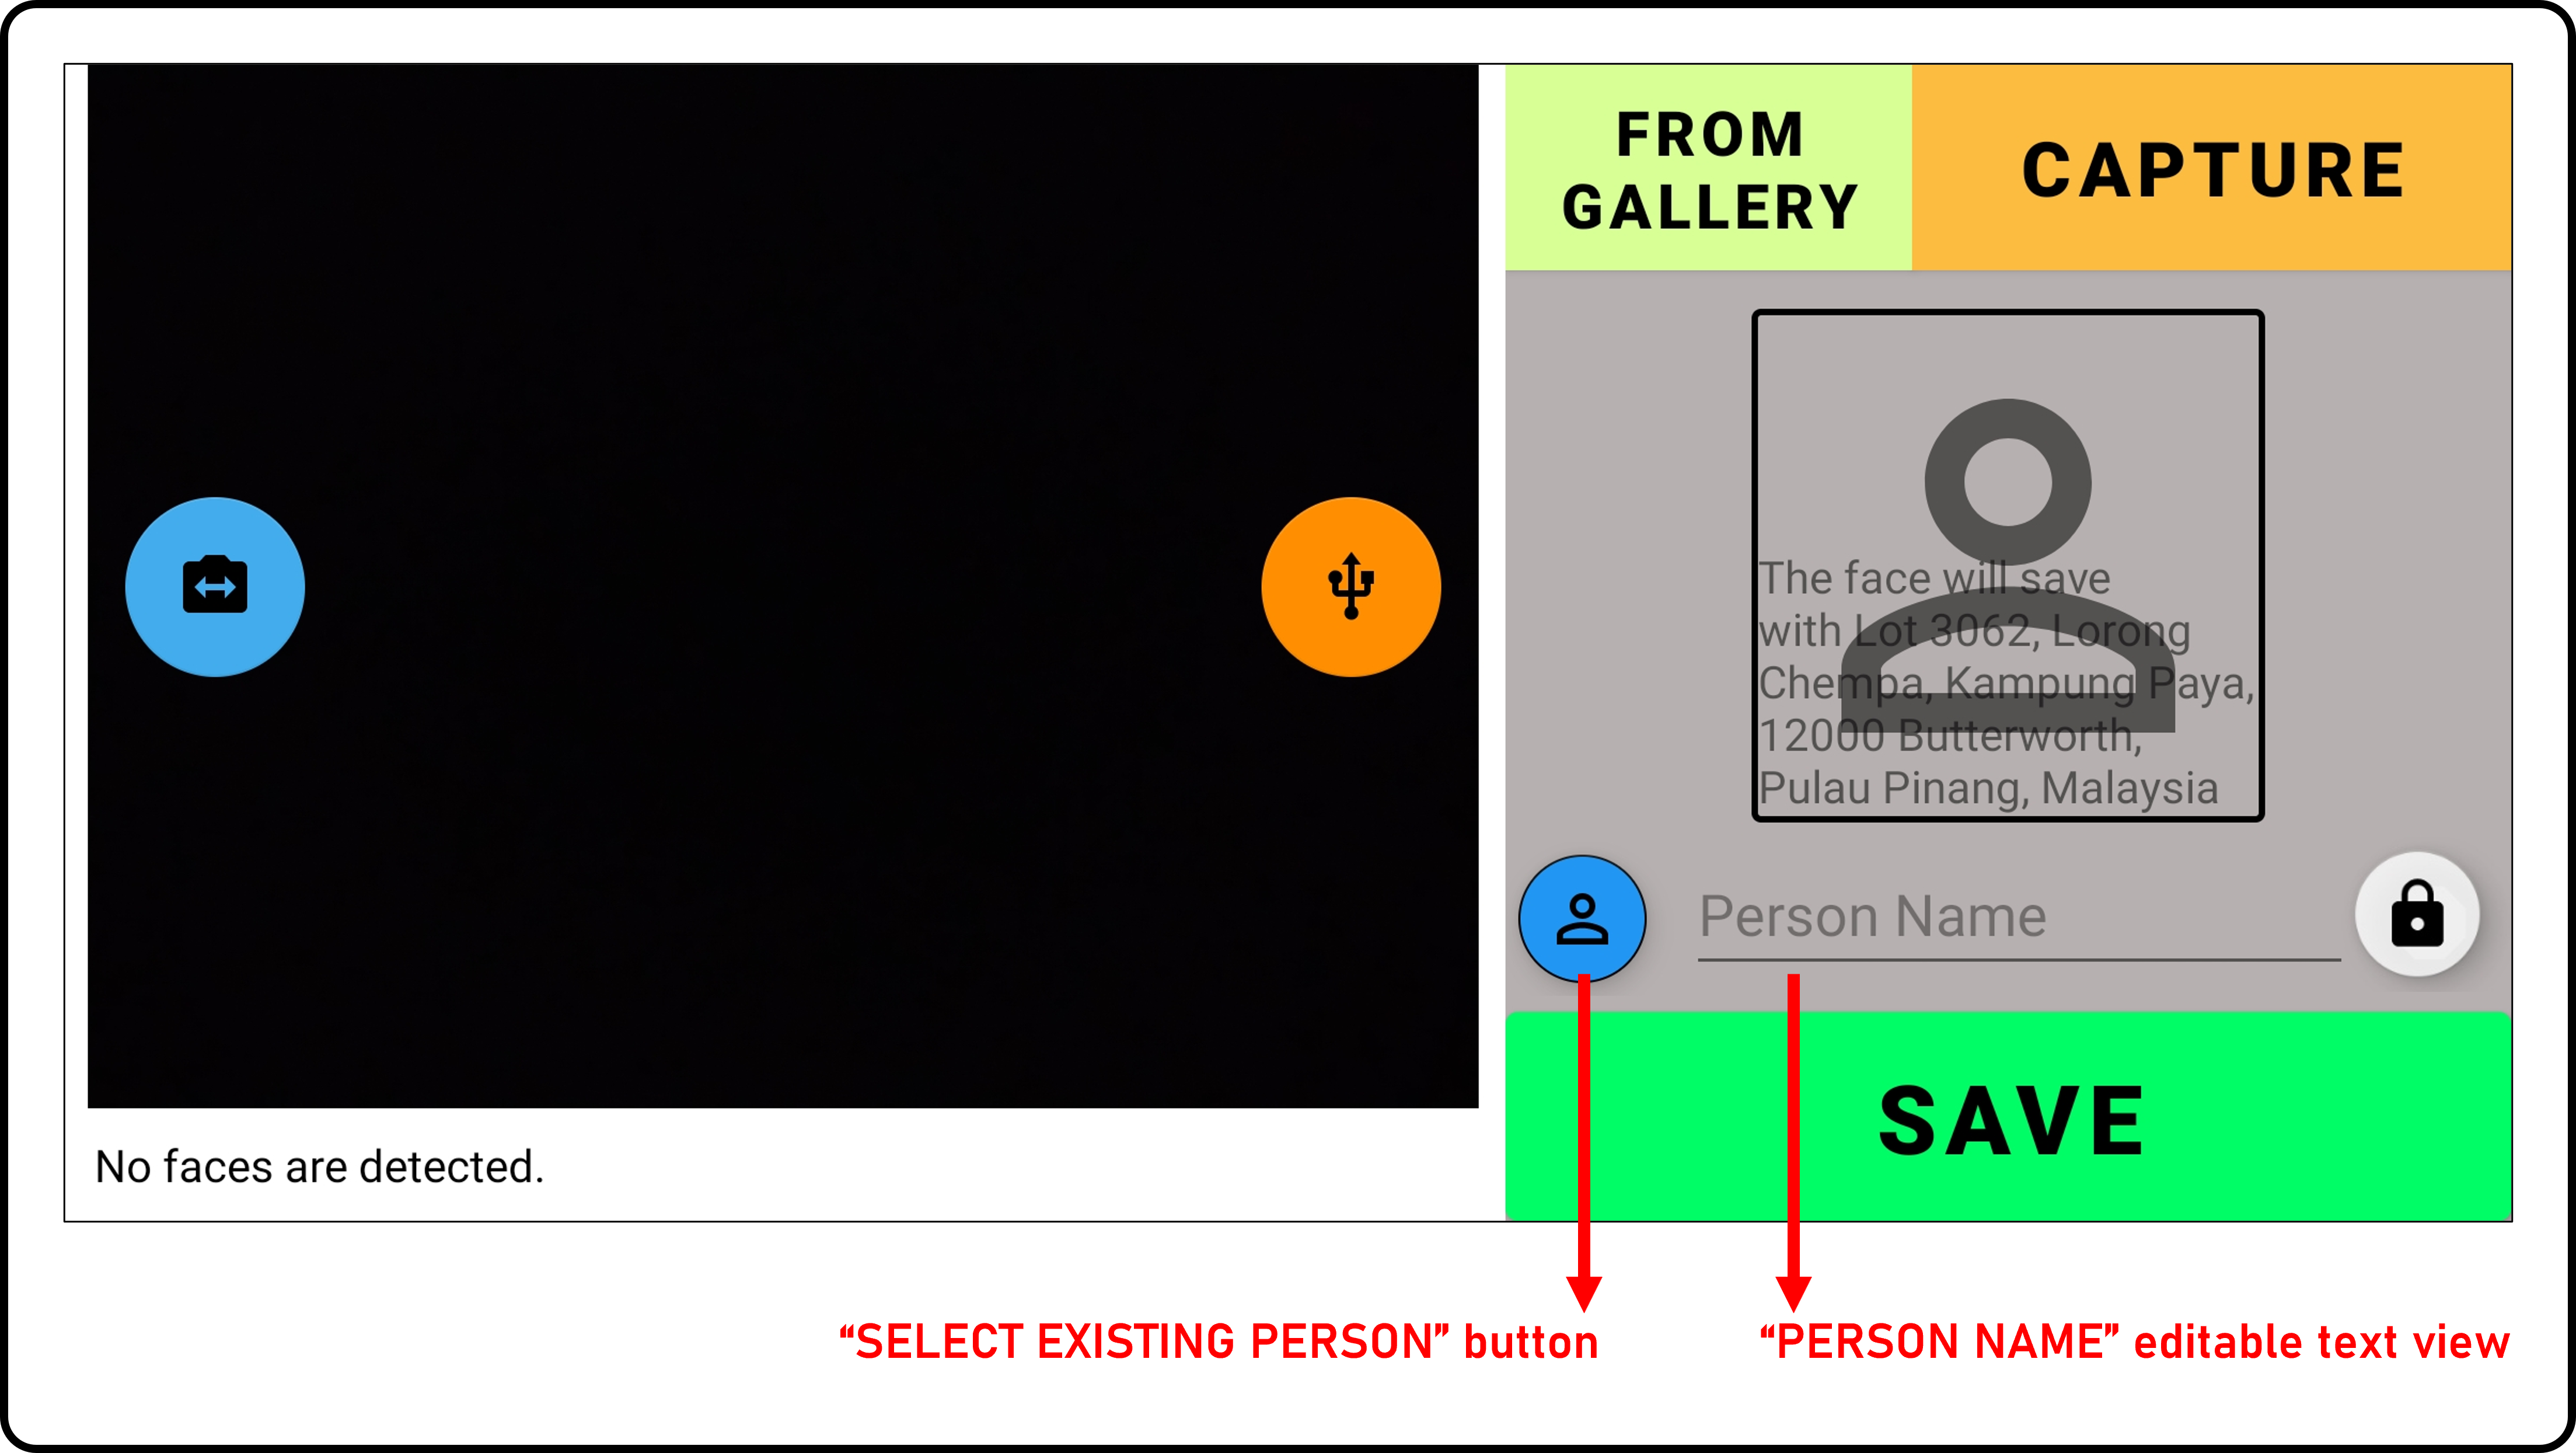
add face page print screen

  1. The left pane is the camera view. (Same with in camera recognition page)
  2. The right pane is adding area. Top there are 2 buttons.
  3. Click the "FROM GALLERY" button to select a photo from the gallery. The system will automatically crop out the most significant face.
  4. Click the "CAPTURE" button used for capture and crop out the most significant face from the camera.
  5. After that, enter the person name at the "PERSON NAME" editable text view.
  6. Lastly, click the "SAVE" button to complete the edit process.


  • During saving, the current location (if applicable), image source, time will be save together as the image description.

On-Screen


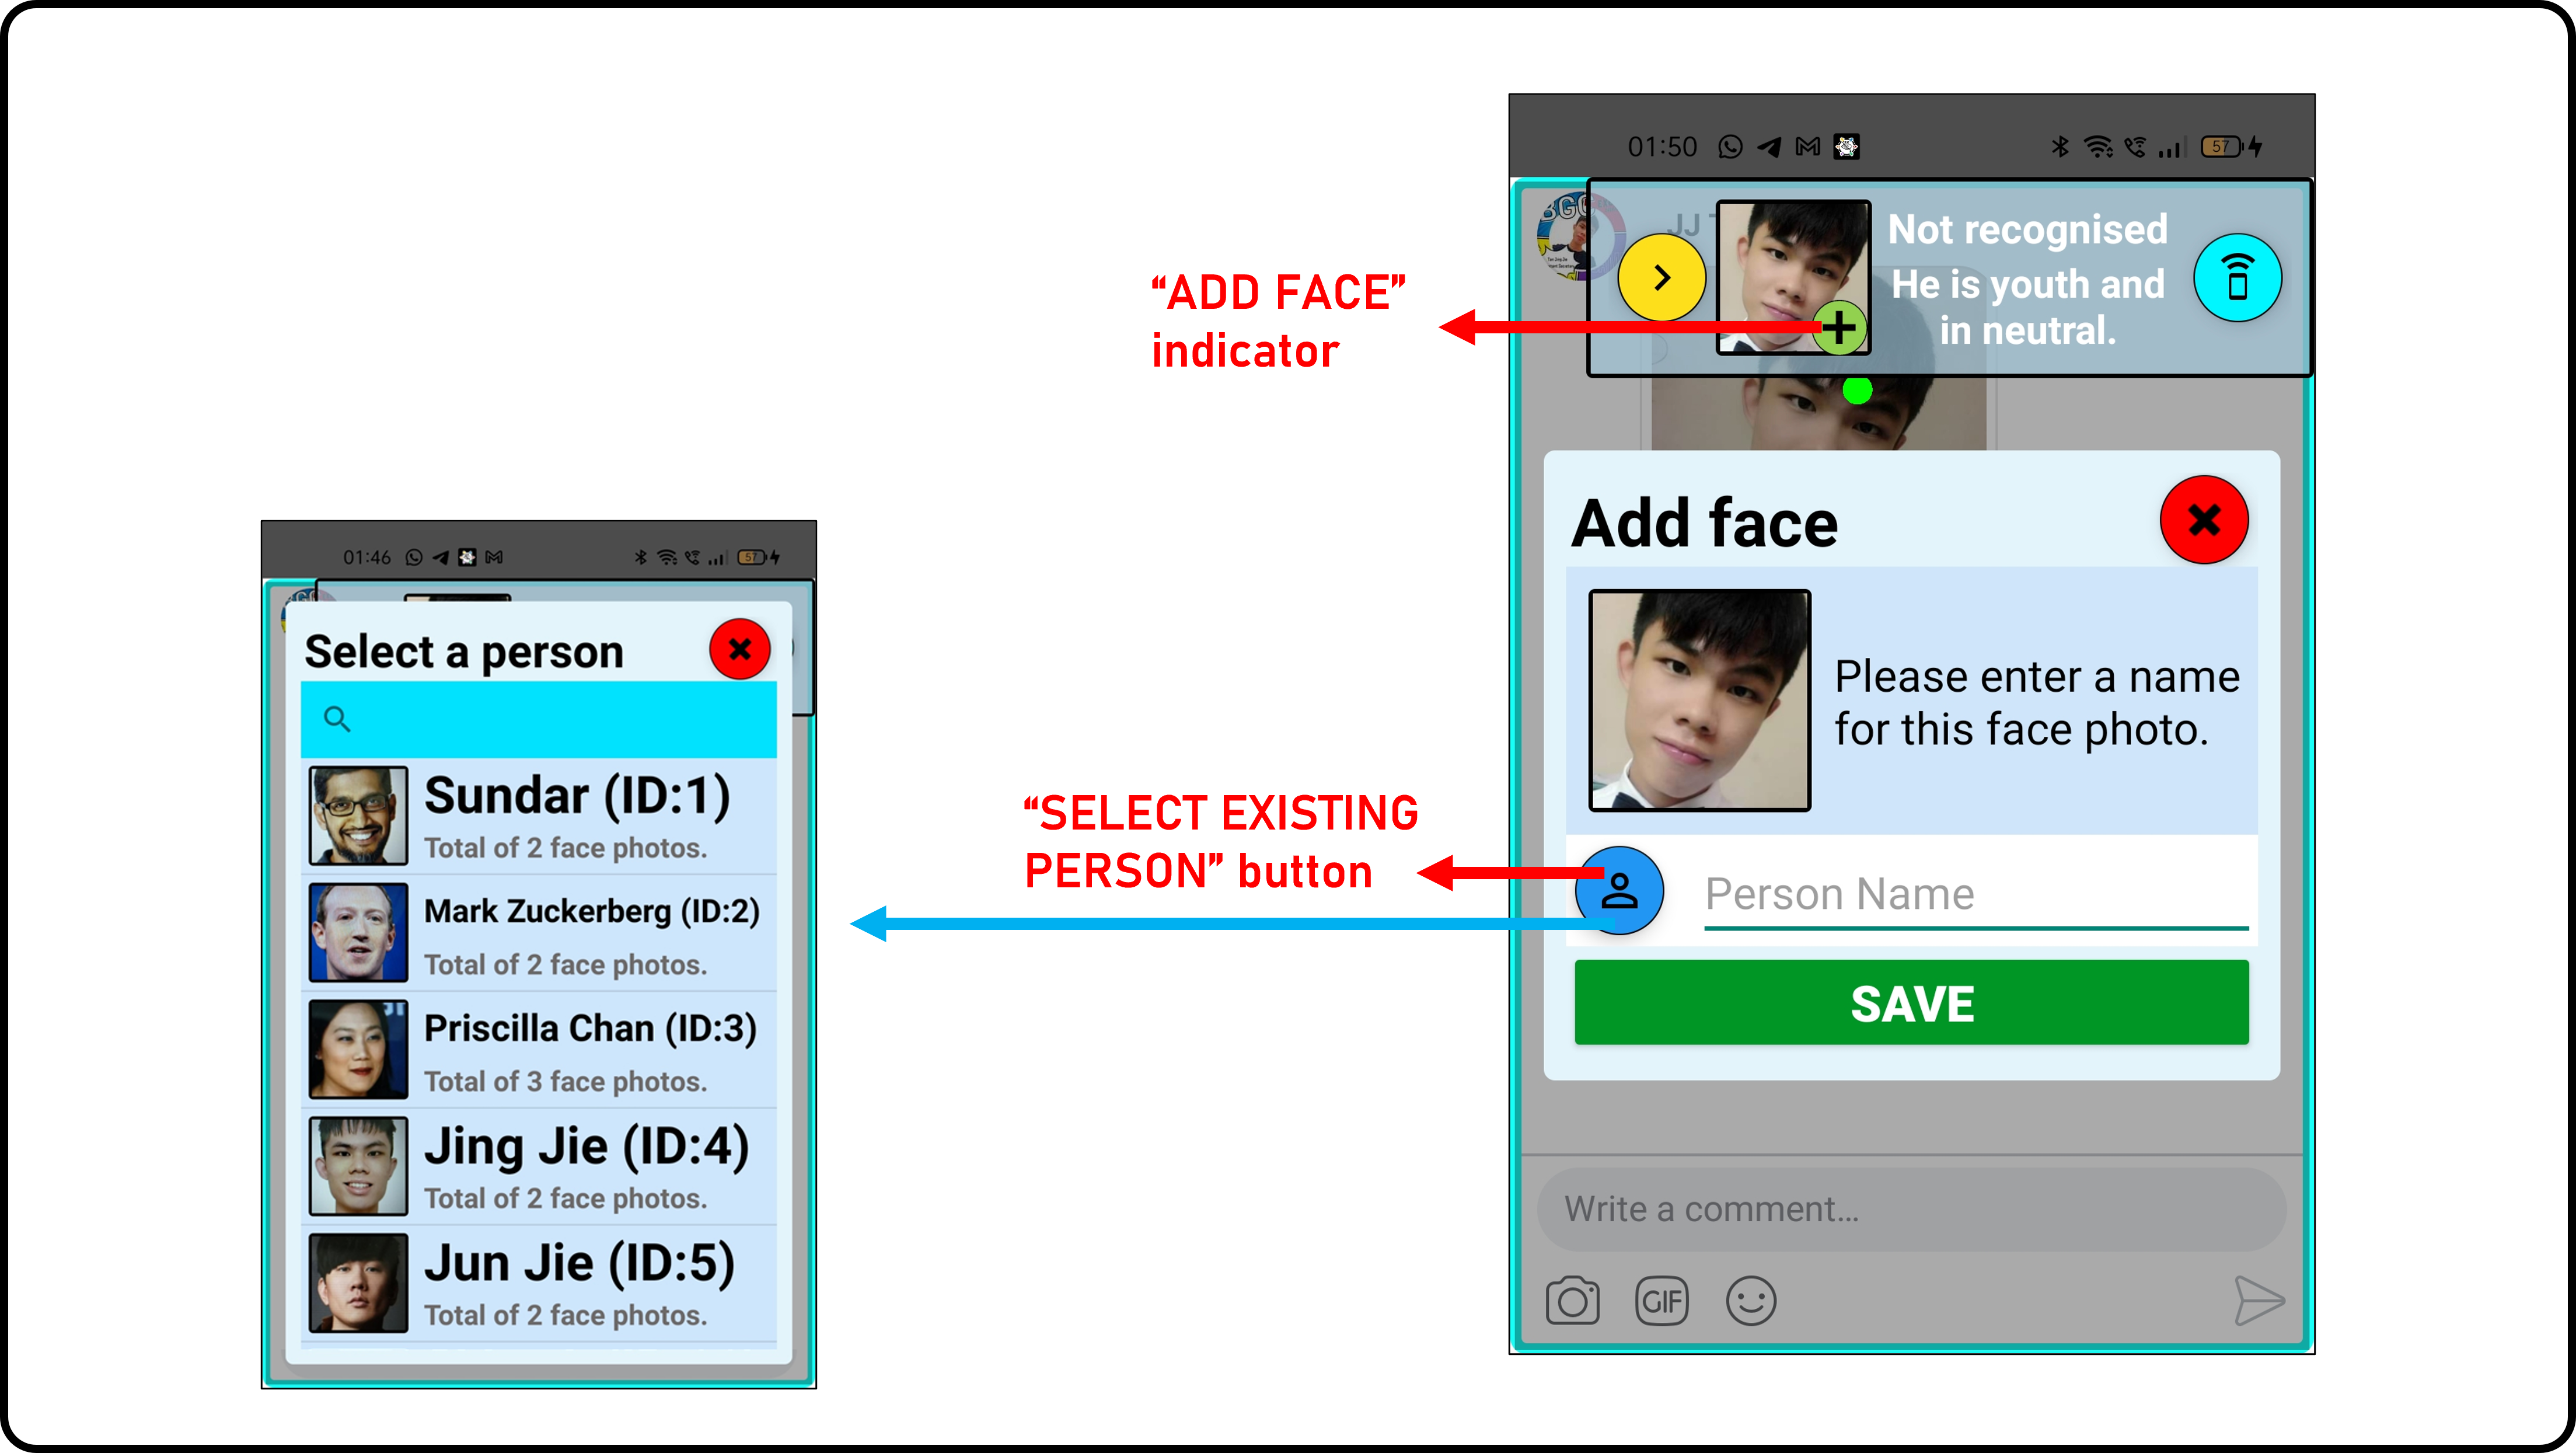
add face via on screen print screen

  1. This starts from selecting a face from the screen. (Refer to On-Screen Recognition)
  2. By default, the details of the pointed face will be spoken. You can add the pointed face by clicking the ADD FACE INDICATOR (the whole "PREVIEW" image view is clickable).
  3. Hence, an add face dialog is shown.
  4. After that, enter the person name at the "PERSON NAME" editable text view.
  5. Lastly, click the "SAVE" button to complete the edit process.


  • You may add multiple faces for a person. You may click the "SELECT EXISTING PERSON" button to select the existing person from a prompted dialog.
  • However, you may also have the option to type out the respective person name manually at the "PERSON NAME" editable text view.
  • The function applicable to Add Face Record via On-Screen


Edit Face Record


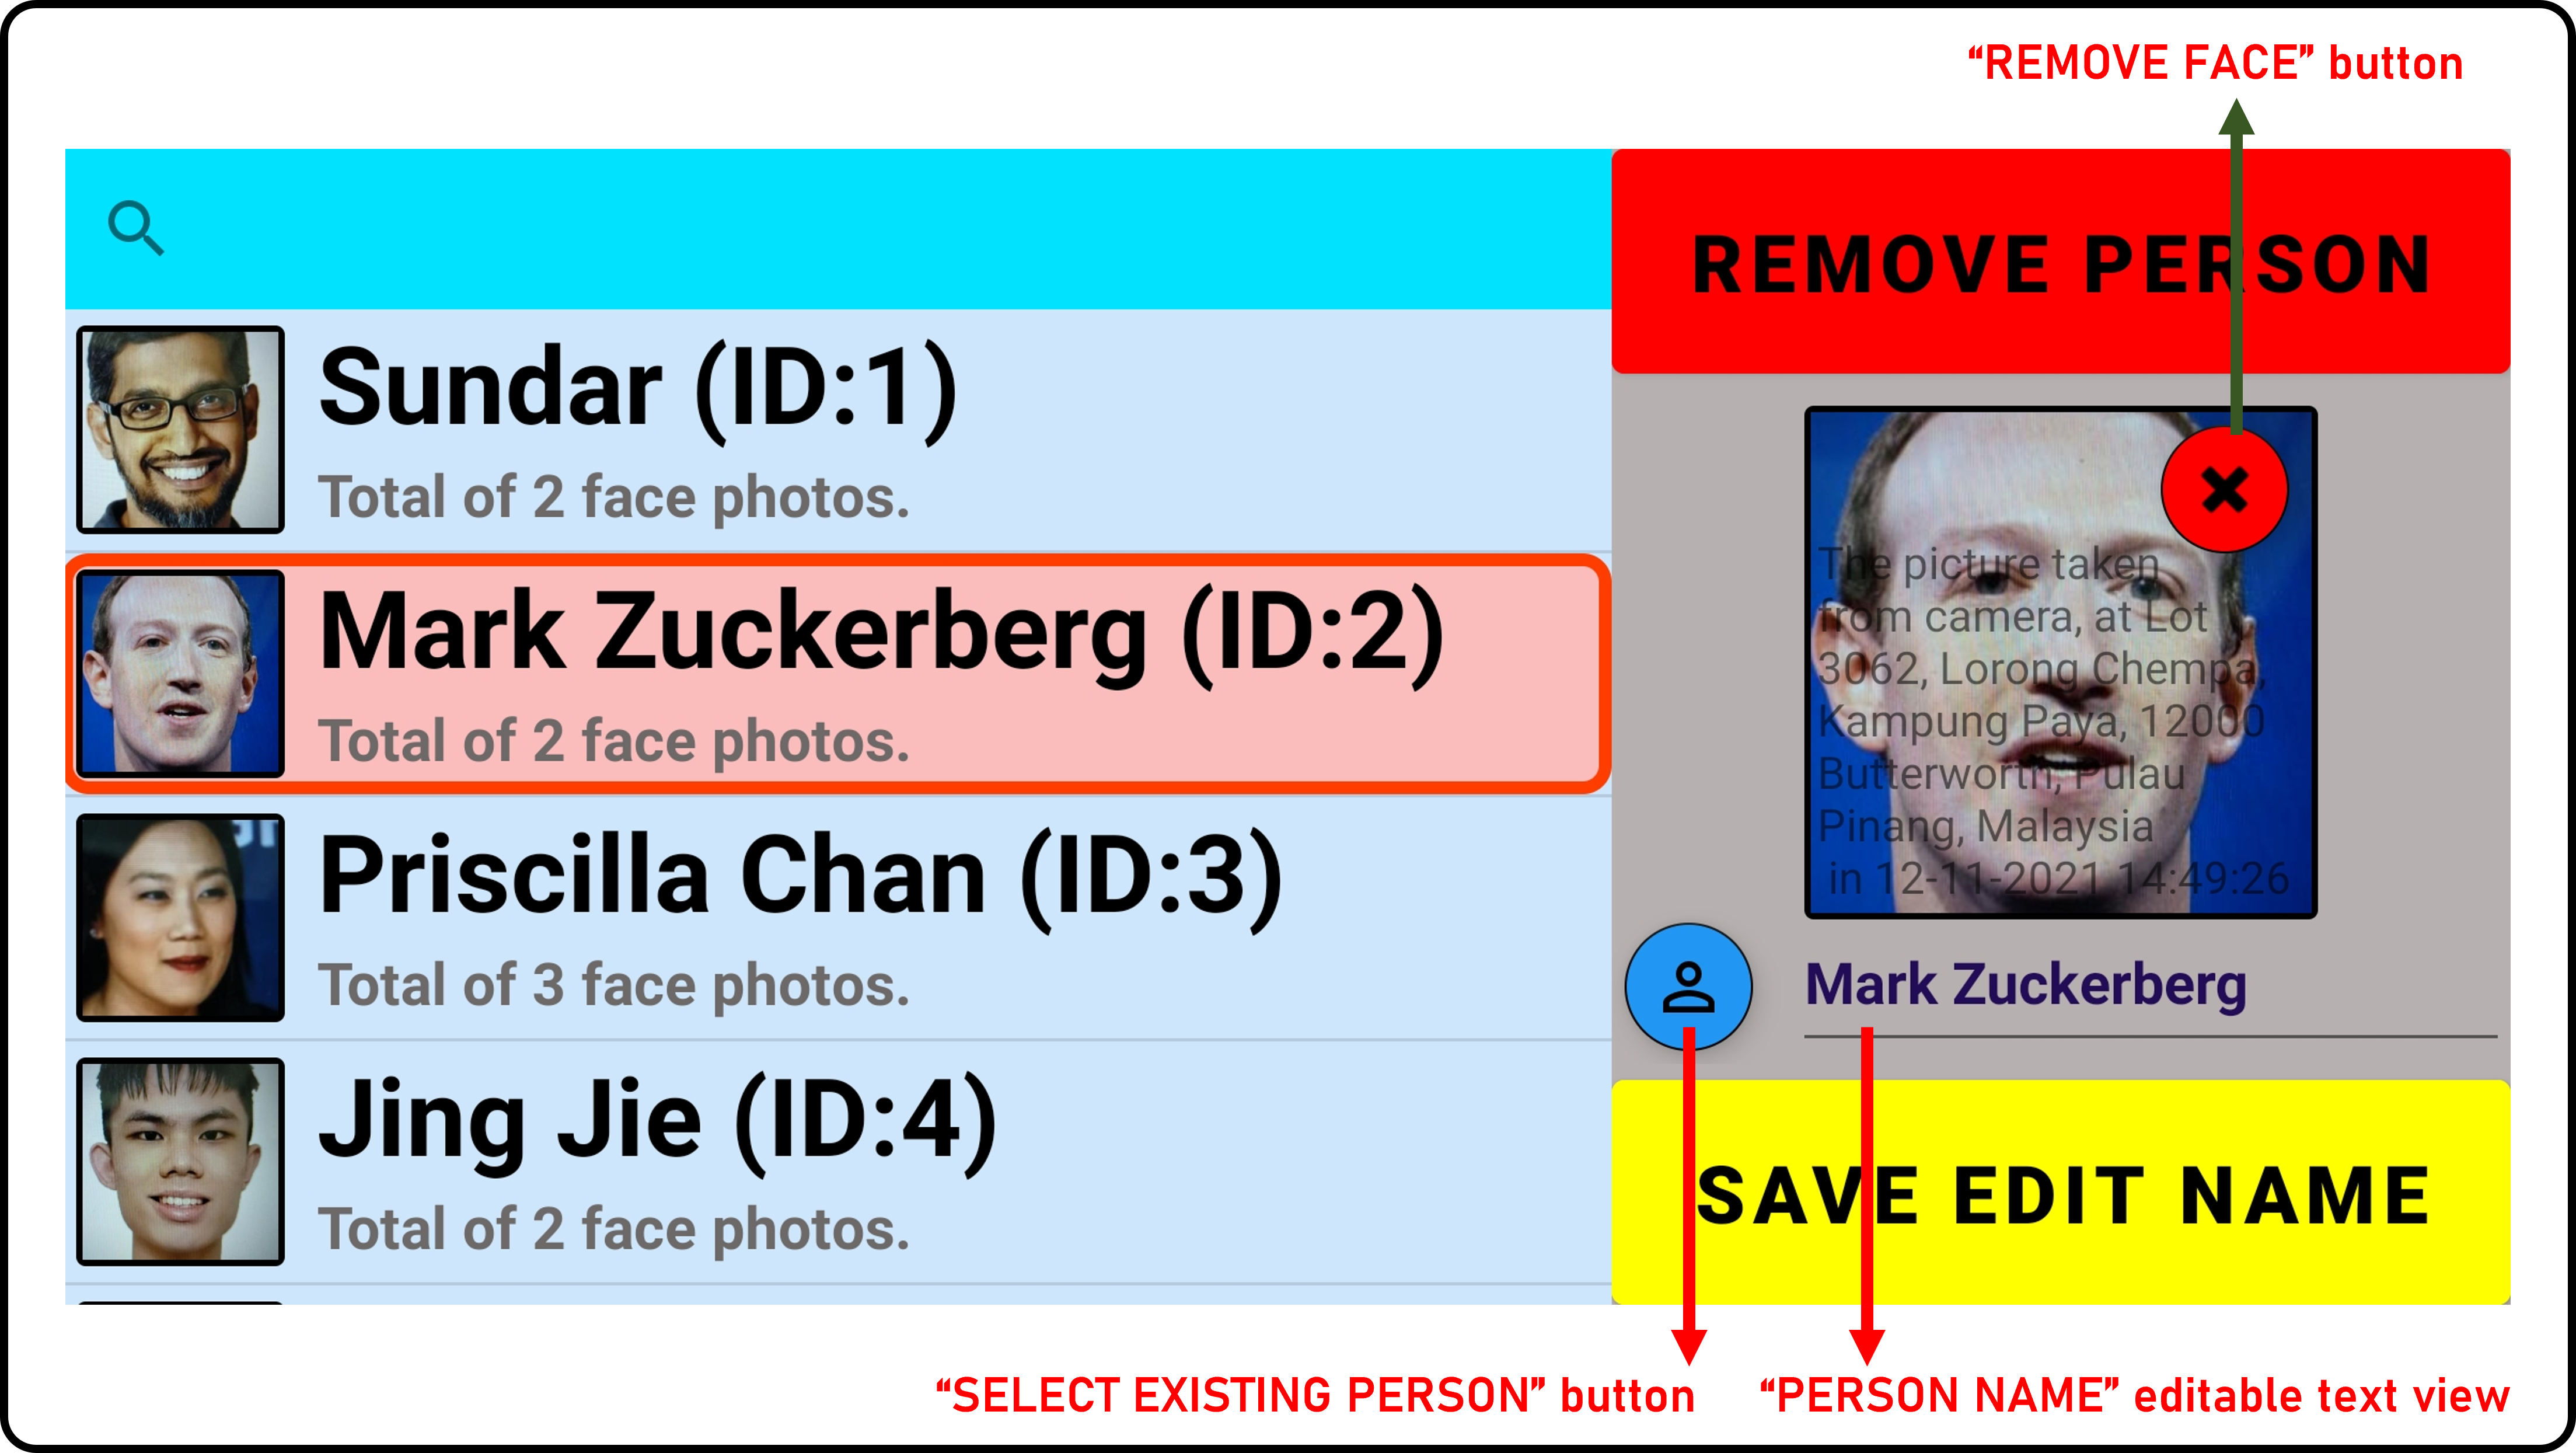
edit face page print screen
  1. The left pane is for searching and viewing the current record in the database. You may select one person and move to the right pane for edit or remove.
  2. The right pane is the edit area. This area is only activated after the user selects a person from the left pane.
  3. The most top is the "REMOVE PERSON" button. When clicked, the person and all the related faces of the person will be removed.
  4. There is a slider image view, you may press the "REMOVE FACE"("x") button to remove a single face from the respective person.
  5. Lastly, you may edit the person name at the editable text view. Then click the "SAVE EDIT NAME" button to save the edit text.


Backup Face Record


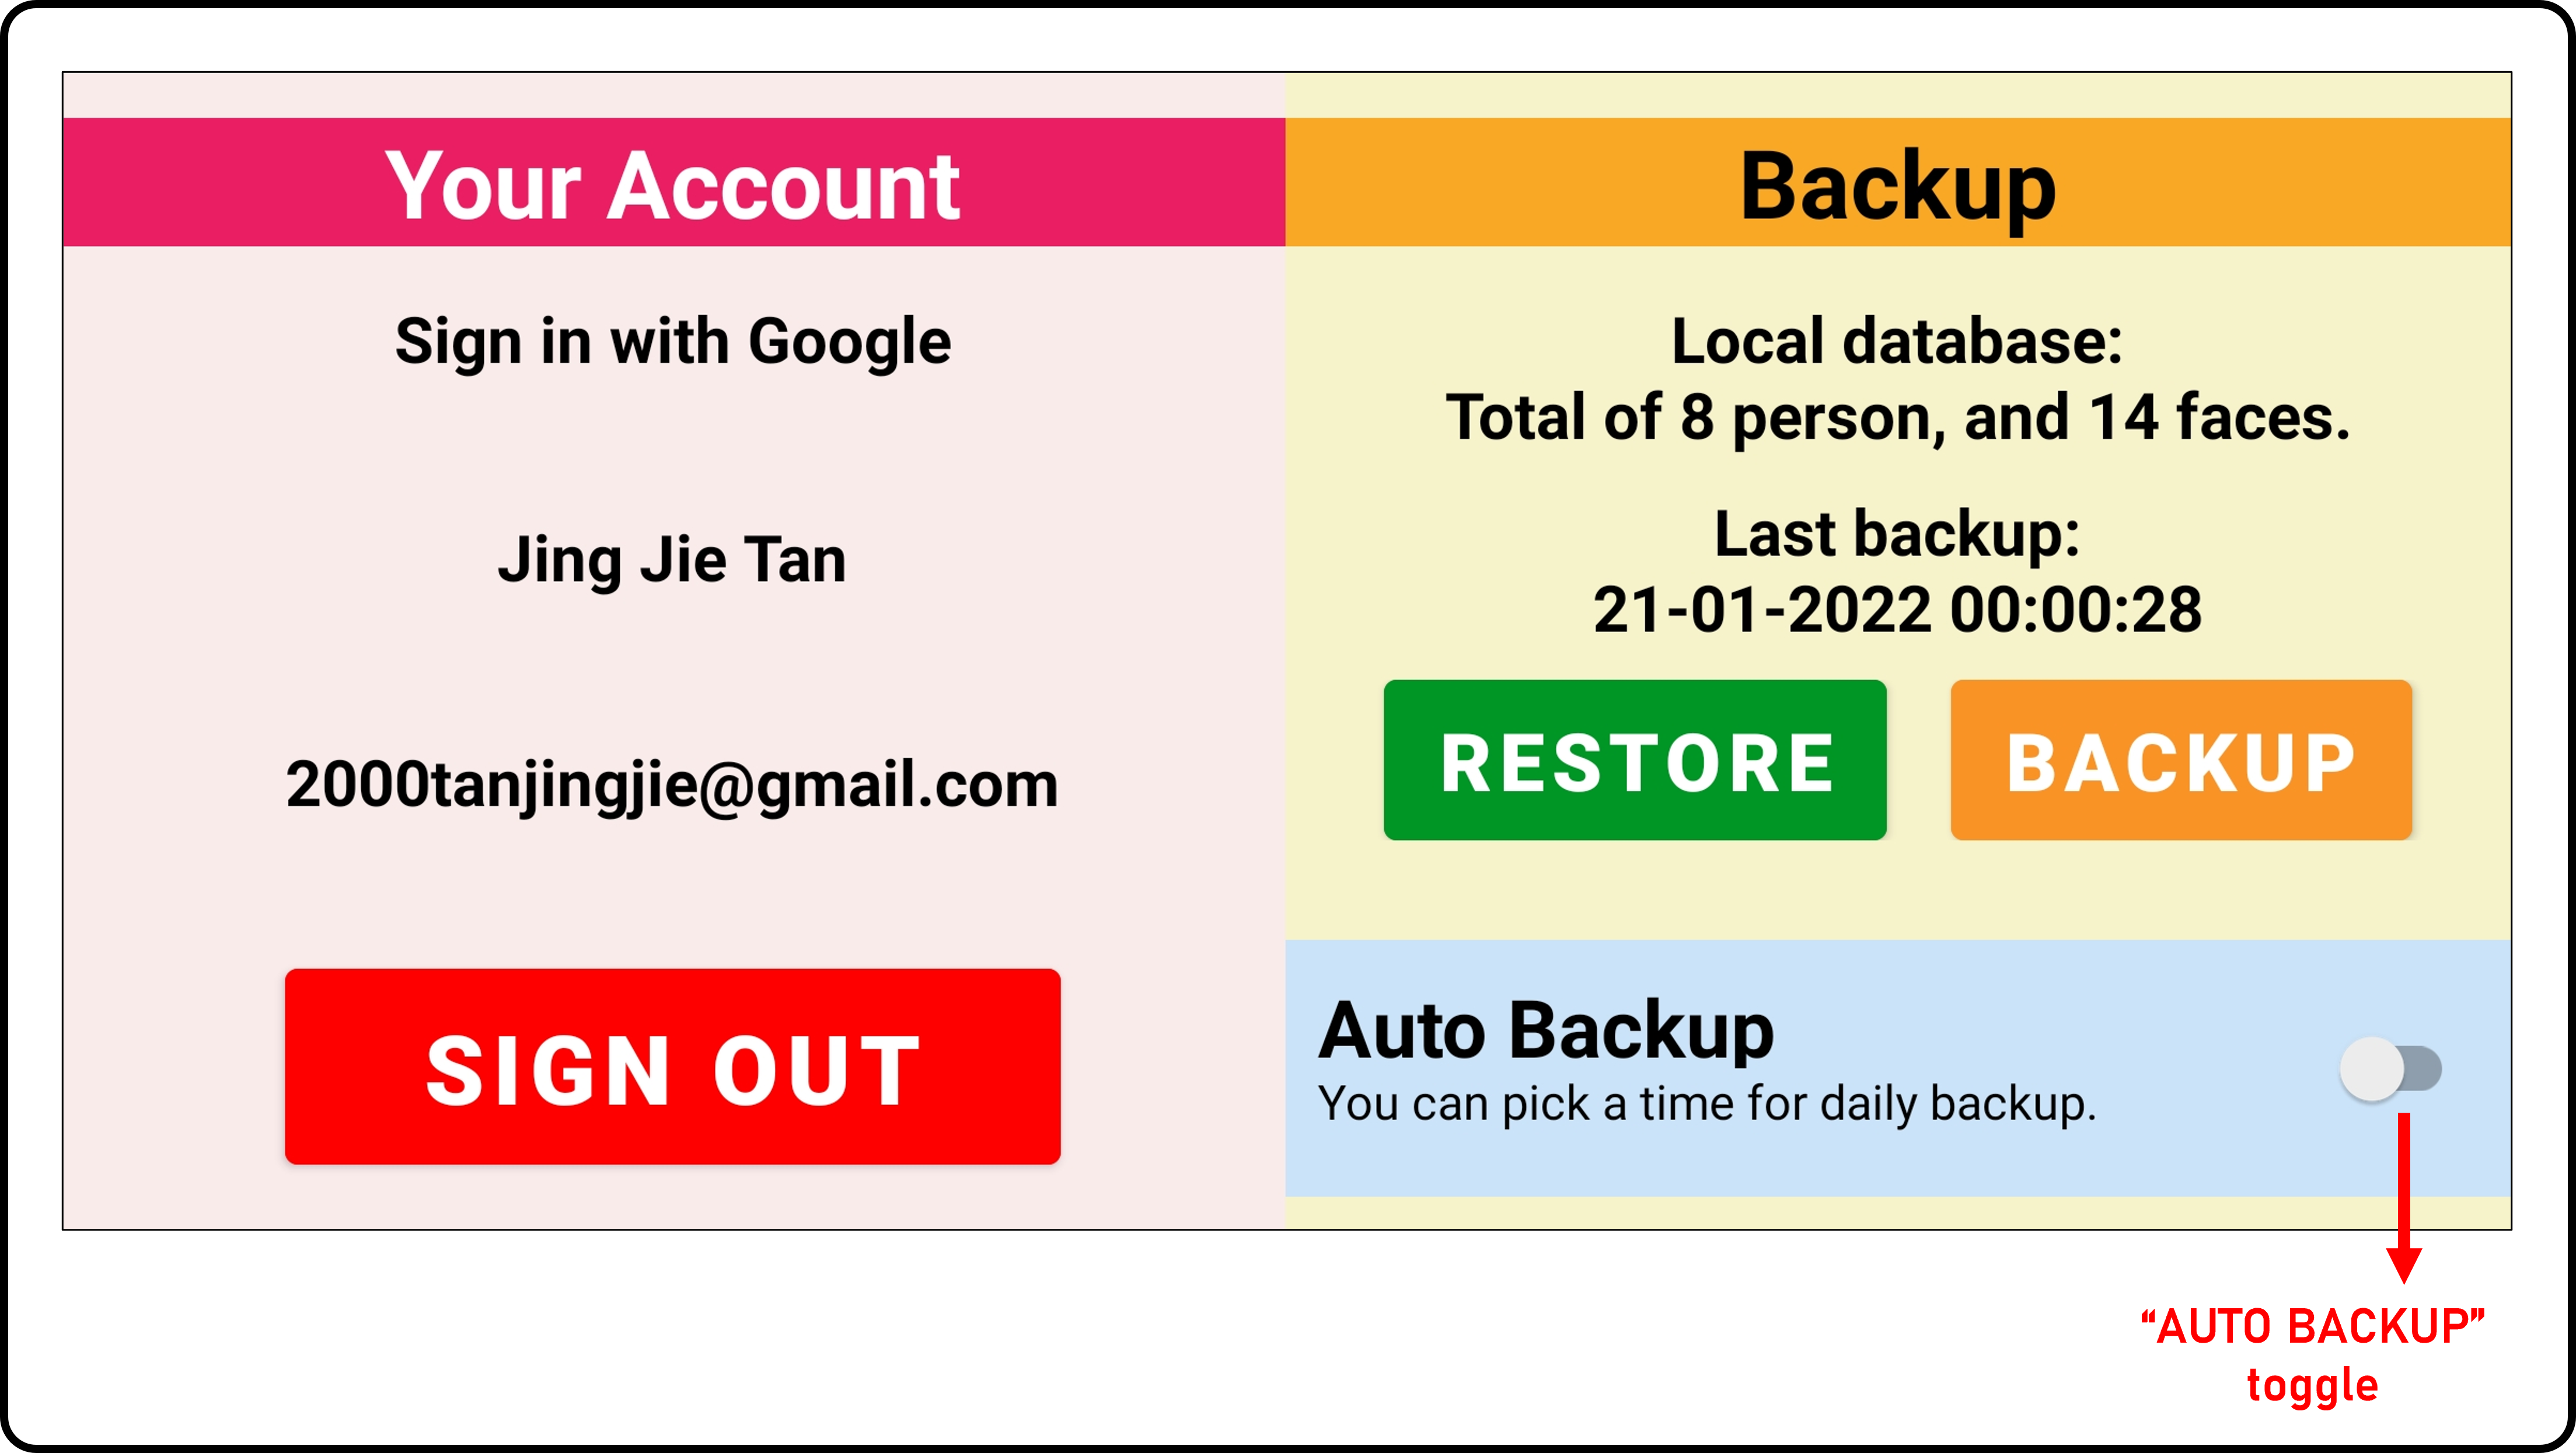
account page print screen
  1. The left pane is the account-related page. You may get your account details or sign out here.
  2. The Right pane is the backup area. You may backup or restore manually by clicking the respective button.
  3. Lastly, you may set auto-backup by switch on the "AUTO BACKUP" switch. After that, a dialog is prompted to select a daily backup time. You may complete the process by clicking the "DONE" button at the dialog.

  • Please enable the auto-launch and background service to SEAVIP application.
  • This is to ensure the SEAVIP application can serve a backup function with obstacle free even after restart of mobile devices.


Completed

Tutorial is completed and you may start to use the SEAVIP application.
Any enquires feel free to contact via +6011-38100852 or fyp.jingjie@gmail.com
Have a nice day.